
How to Generate Product Short Description Based on Product Name, Brand and Product Attributes with ChatGPT
Do you find it time-consuming to manually add missing product data? Generate short descriptions based on product name, brand and product attributes in bulk with Store Manager for Adobe (Magento) software. If you do not have the software yet, it is a perfect time to get a free trial now. Let's get started!
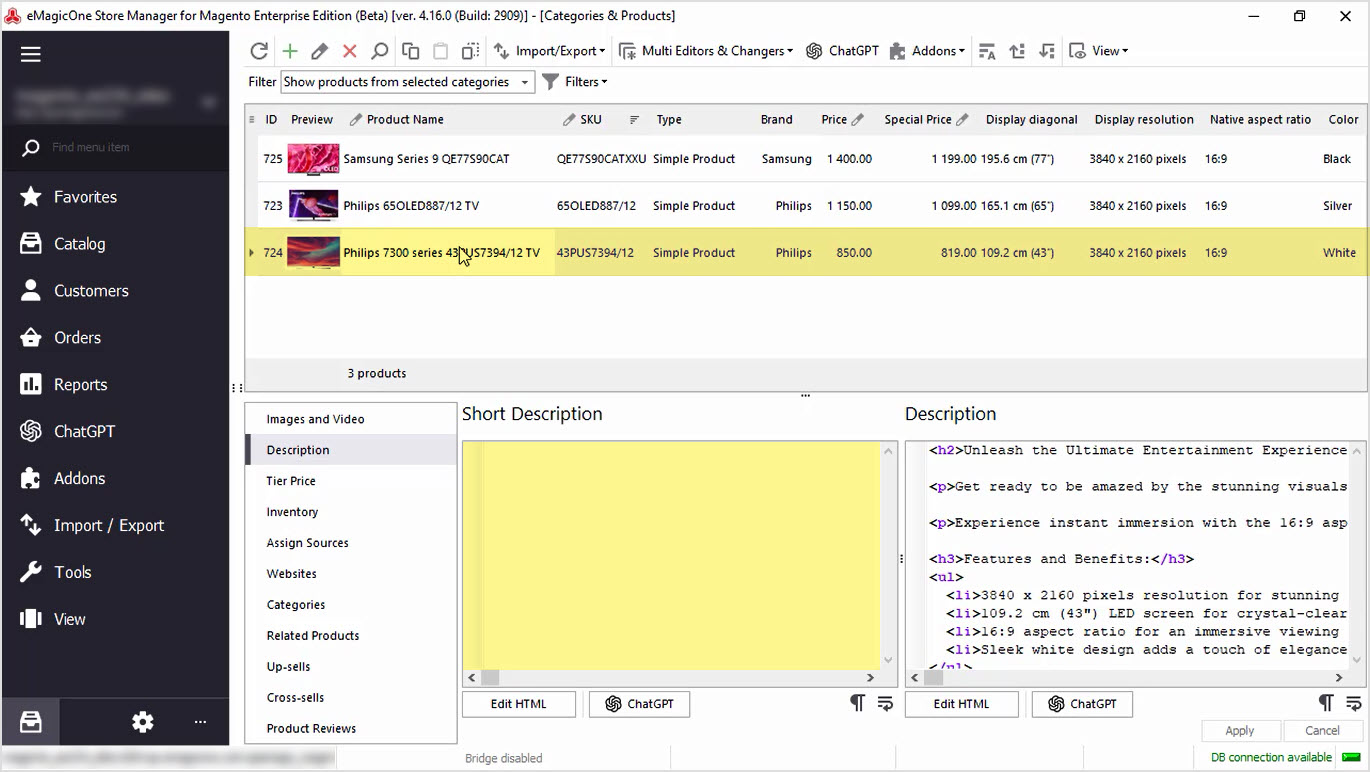
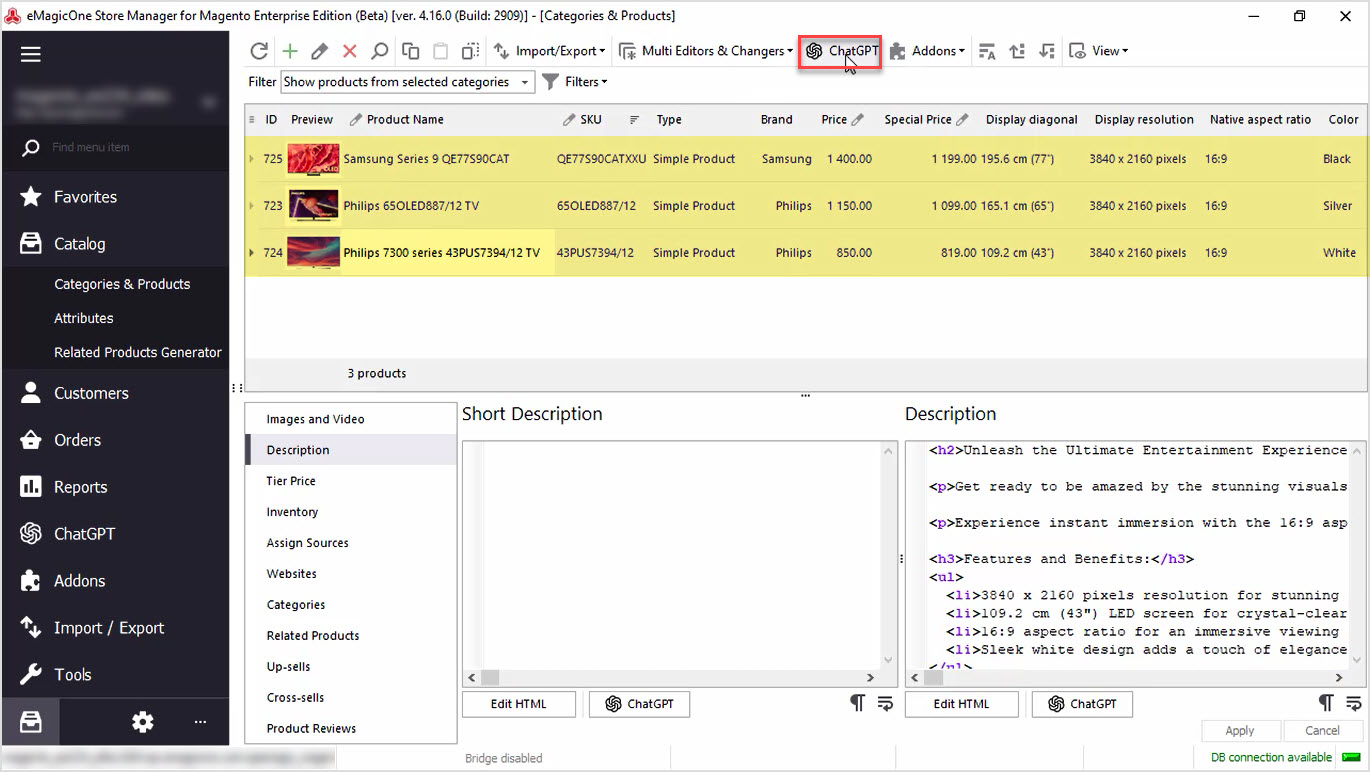
Before we proceed with short description generation, let's check the data we have now. In the screenshot below, you can see a list of products that we're going to work with. Our products do not have a short description yet. Here you can see the empty field.
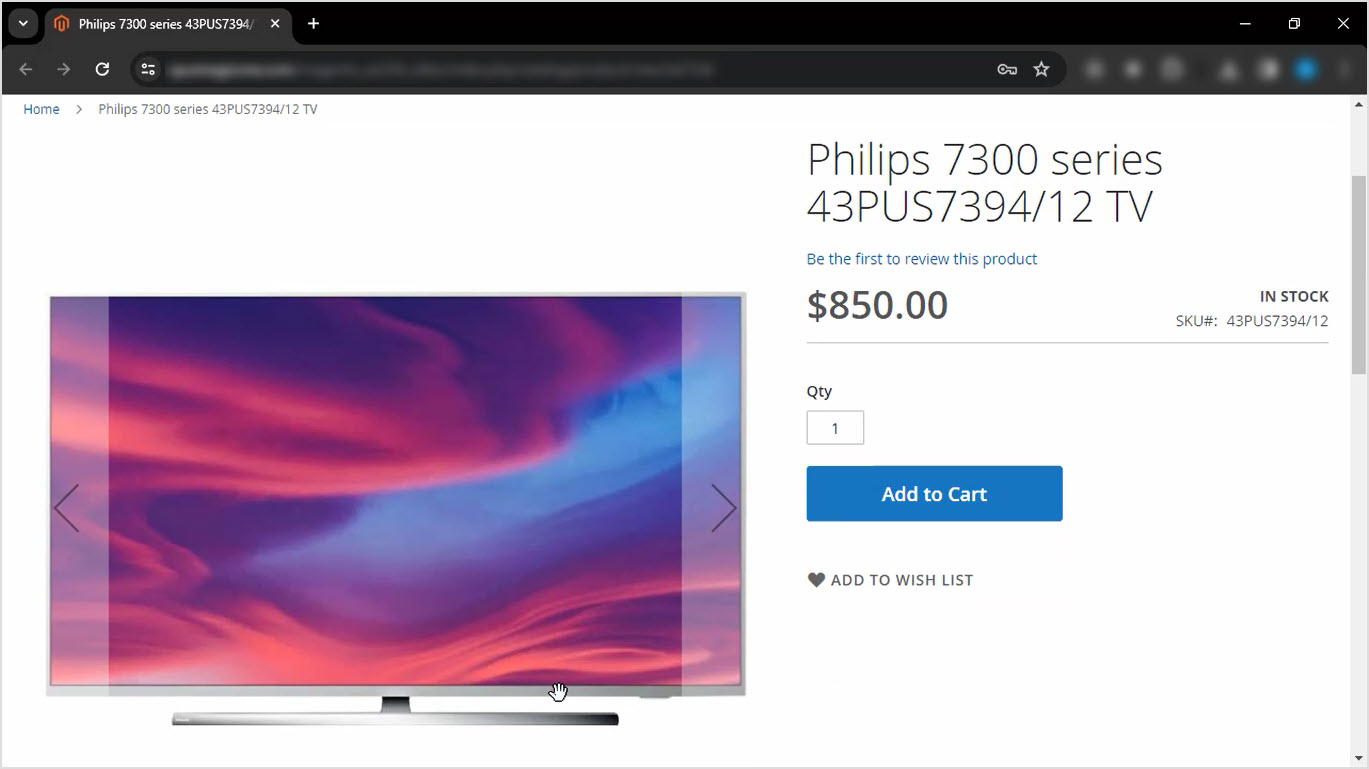
Let’s check our product on the frontend. No short description here as well.
Step 1: Create Your Own Prompt
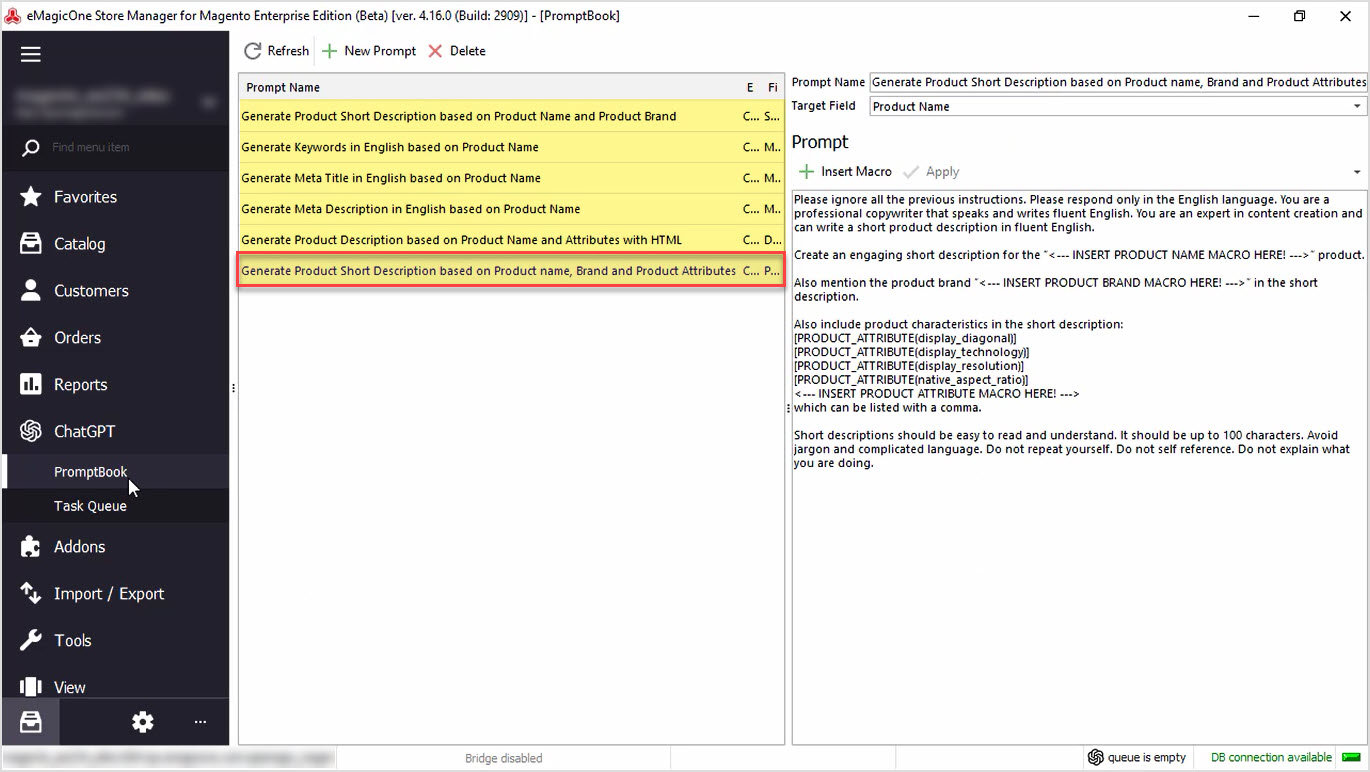
To generate a product short description, we should start with our prompt editing. For that, go to the ChatGPT menu and open PromptBook. In this menu, you'll see a list of prompts that can be applied to Magento products massively and you can create your own prompt depending on your needs.
We'll use the prompt that allows us to generate a short description based on product name, brand and attributes.
Step 2: Insert the Desired Macro in the Prompt
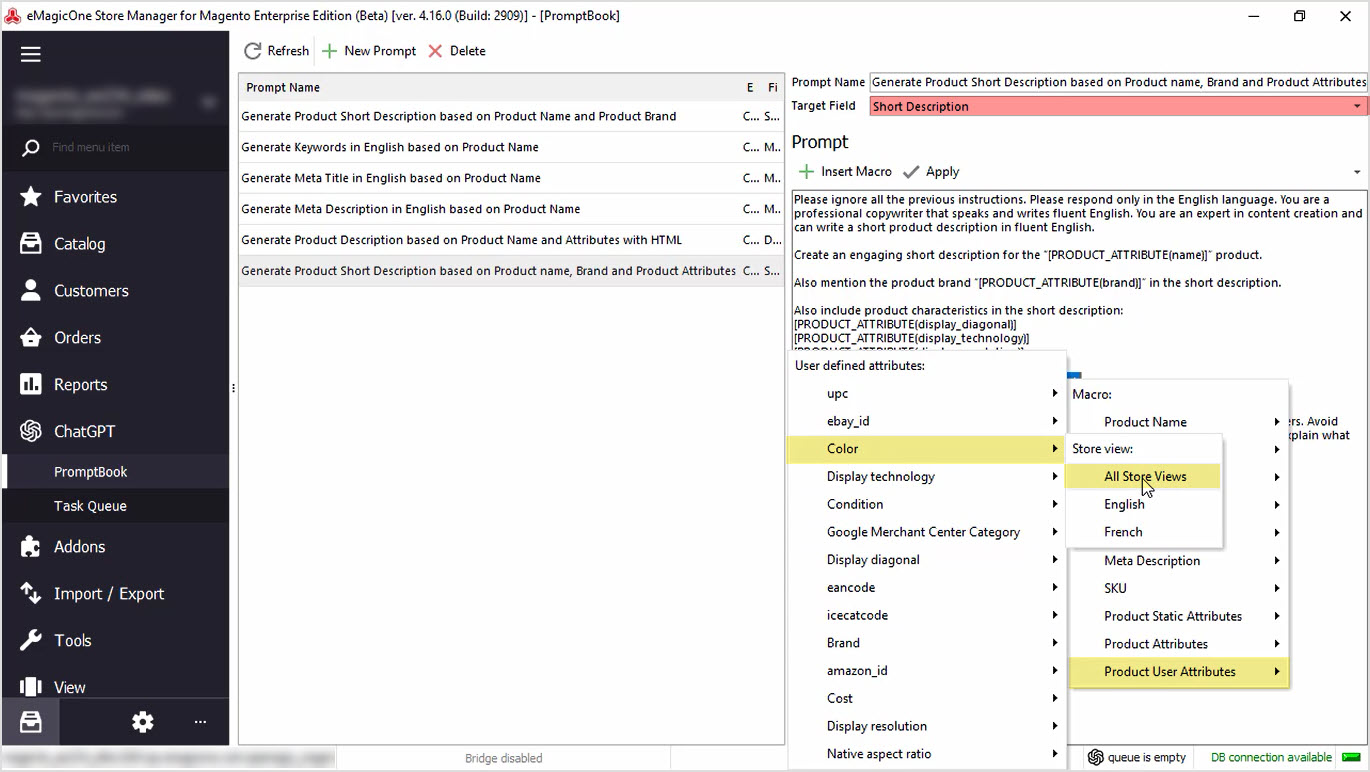
Our target field should be set to Short Description. That is the field that the result will be saved into.
Here you can also find a macros list with product fields that can be used for the content generation.
Play around with your prompt to generate the perfect content for your business.
We'll generate the short description and use the product name and product brand fields. In this window, you can see a list of attributes that we'll use for short description generation. Let’s add the color attribute.
Do not forget to hit "Apply" to save changes.
Step 3: Go to the ChatGPT Mass Changer
Once you are done with your prompt, let’s select the products to generate our short descriptions for. To do so, go back to the products list and select those, for which you would like to apply this prompt. We recommend selecting a few products for an update to check the result before applying this prompt to all products.
Use the "ChatGPT" button to open plugin settings.
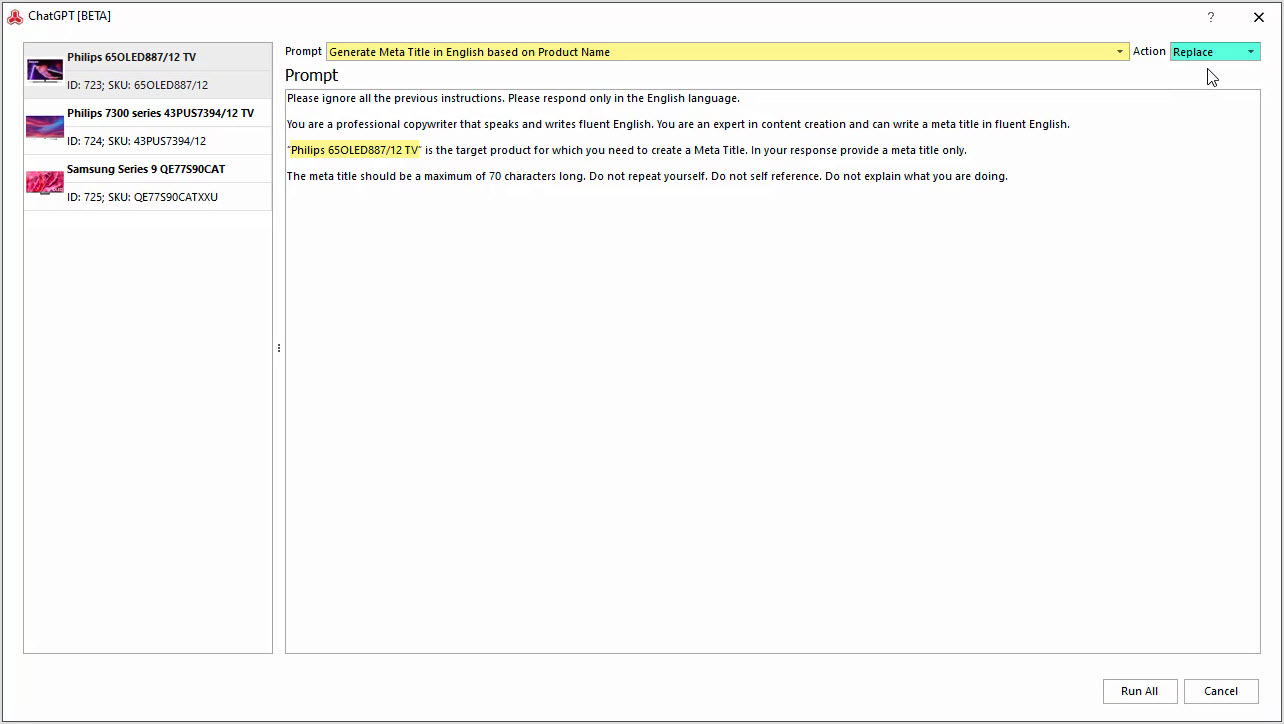
Step 4: Choose a Prompt and an Action
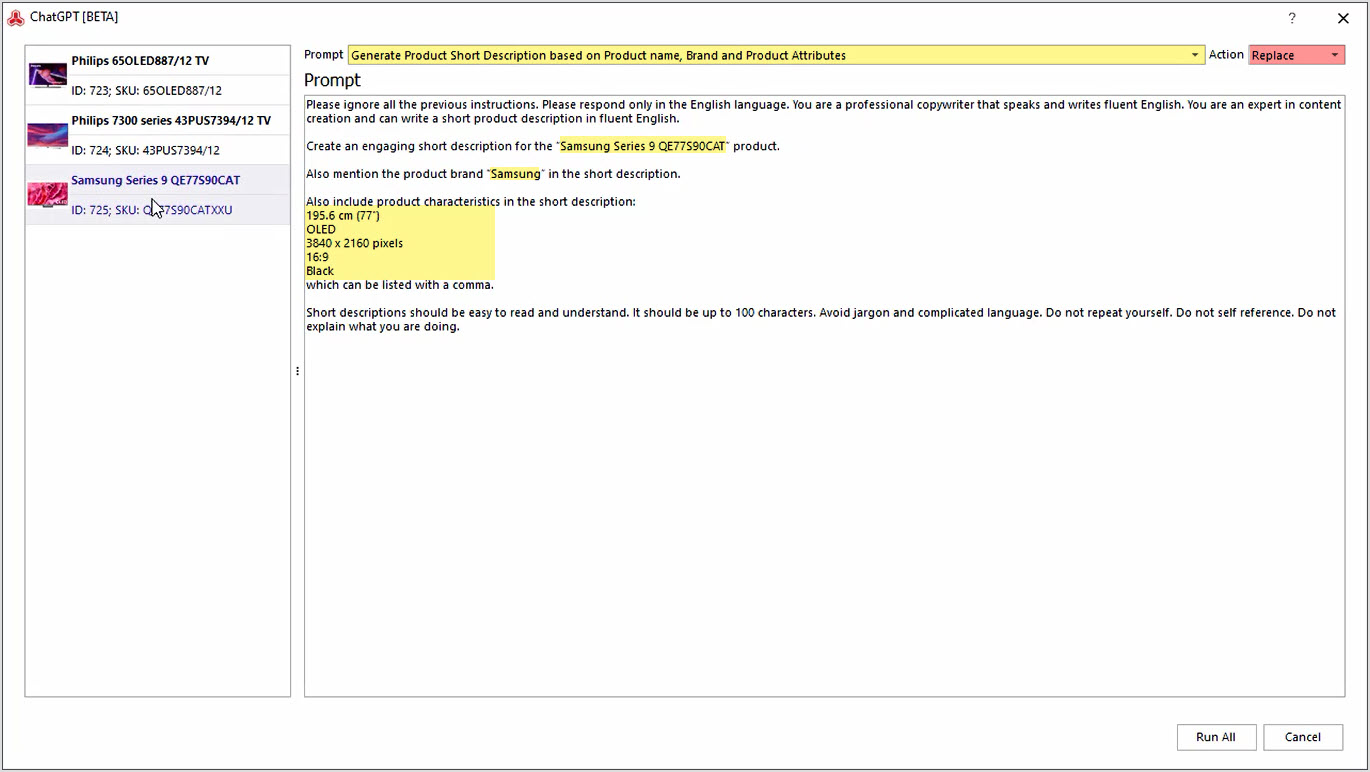
Here you can select the Prompt that you would like to apply, and the Action to be performed.
In our case, we'll select the prompt that we have just edited. Here you can see the data that will be sent to ChatGPT for short description generation.
Also, we will use the "Replace" option to change the existing short description with the one generated with ChatGPT.
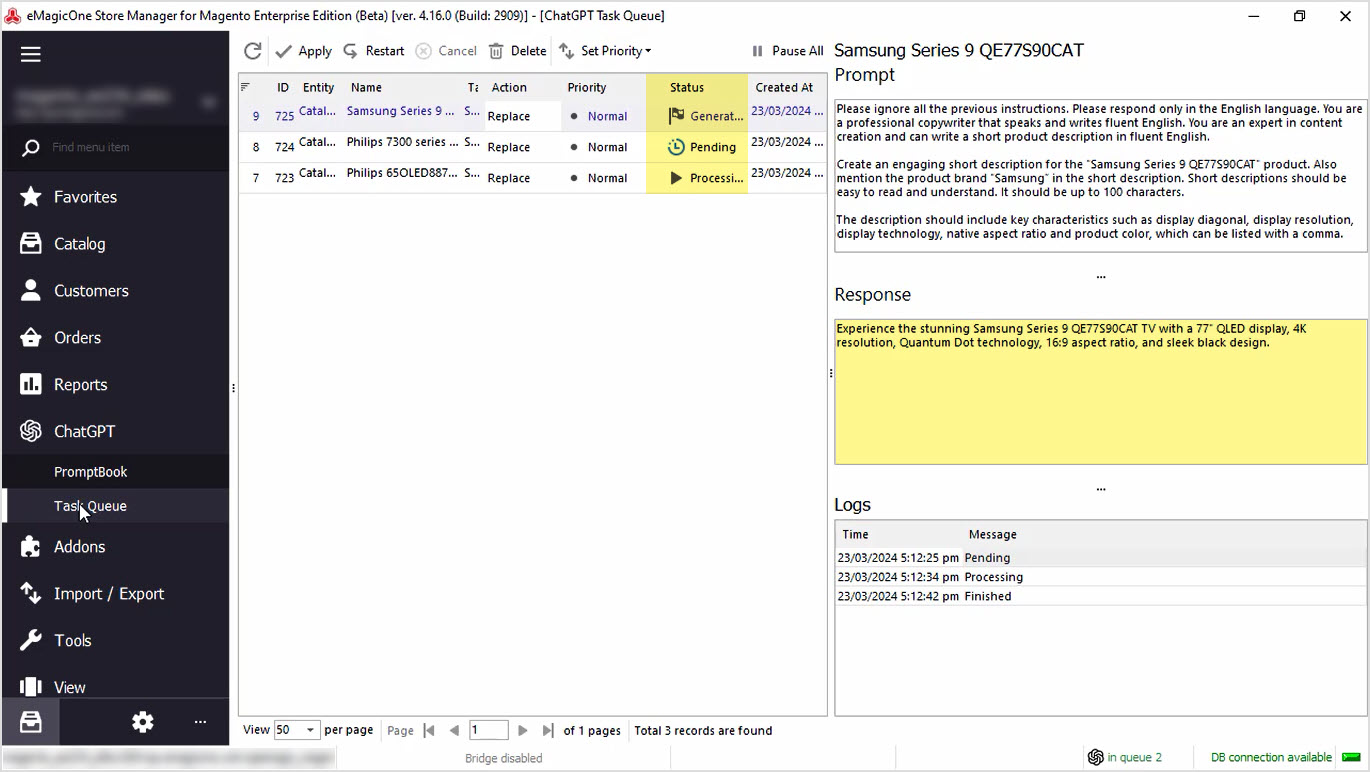
Step 5: Go to ChatGPT Tasks Queue
If all is set correctly, it is time to run ChatGPT and see the magic happen. Let’s go to the Tasks Queue to see ChatGPT in action.
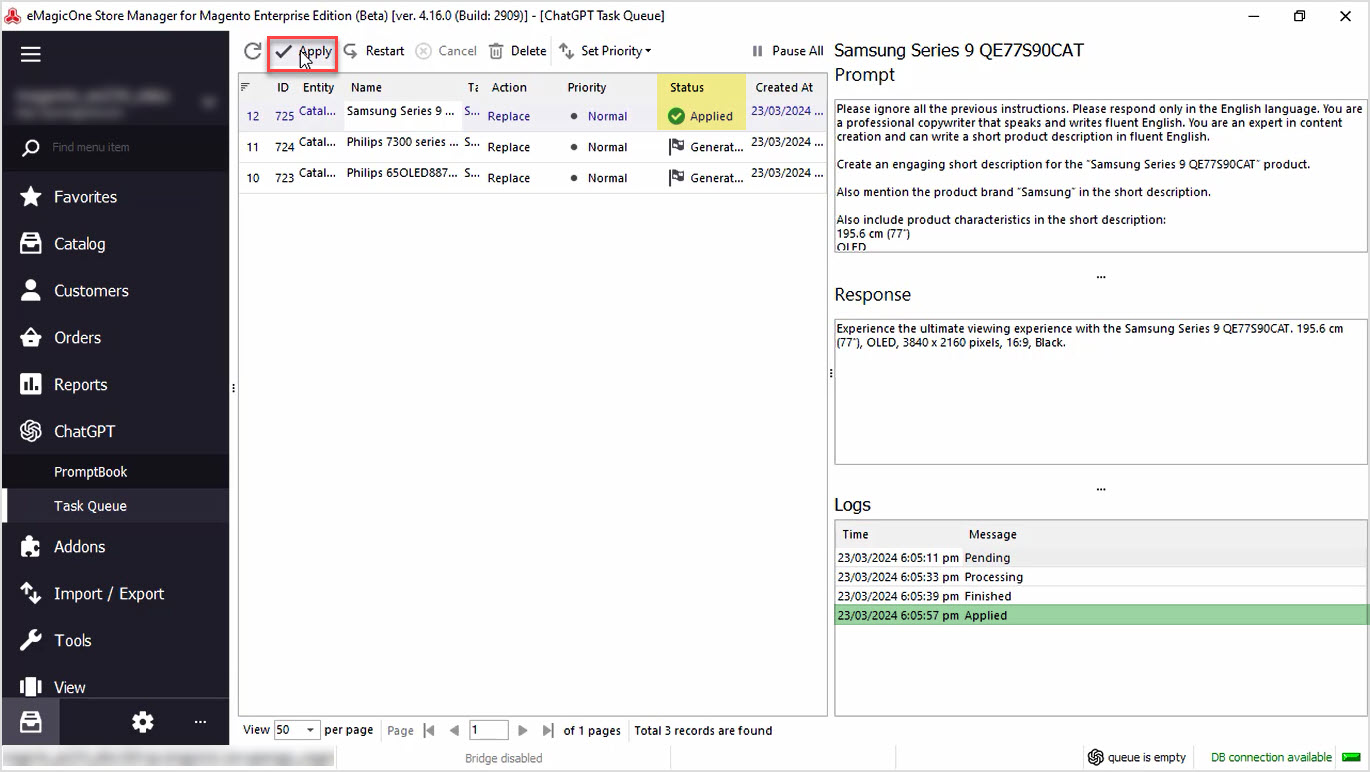
In this section, you can see the list of products and tasks that are executed or scheduled.
The status is changed from Pending to Generated once the short description is generated.
You can see the Response from ChatGPT before applying it to your products.

Step 6: Apply the Result
If you’re satisfied with the result, hit "Apply" for each product one by one or in bulk.
Step 7: Check the Store for Changes
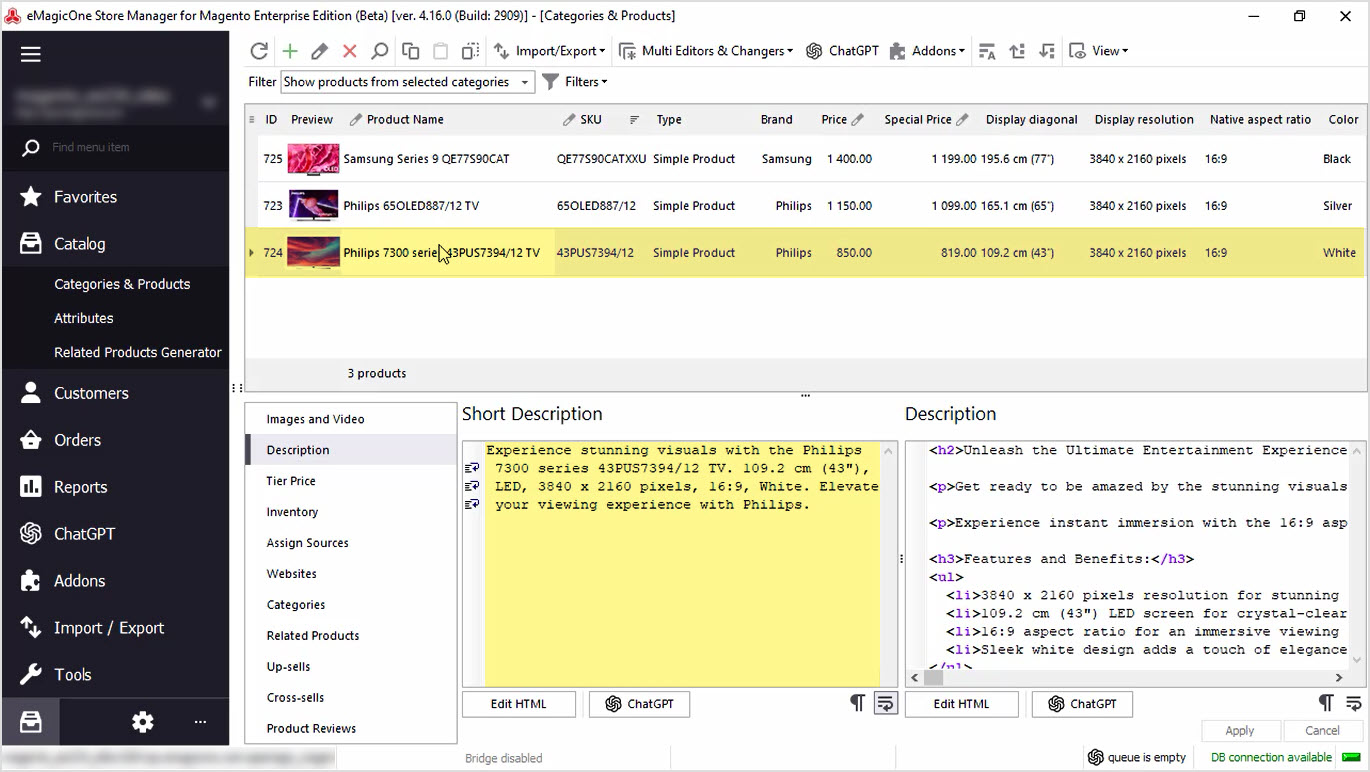
Once the changes are applied, you can check the updated short description.Here you can see our products in Store Manager software. The short description is available here.
Let’s check our product on the frontend. Do not forget to refresh the page to see the result.

You can perform this action for all your products in bulk. You can append or prepend generated texts, or use other product fields like color, size, or any other.
We hope this article was helpful in demonstrating how Store Manager for Adobe (ex Magento) and the ChatGPT plugin can simplify your data generation process. Take advantage of our free trial and try Store Manager and the free ChatGPT tool today!
Generate Product Short Description based on Product name, Brand and Product Attributes with ChatGPT
Download Free Trial Now
Related Articles:
How to Enrich Adobe (ex Magento) Product Descriptions with Call to Action and Add Basic HTML with ChatGPT
Enrich product descriptions in bulk with Store Manager Adobe (Magento) and the ChatGPT plugin. Try the functionality free. Read More...
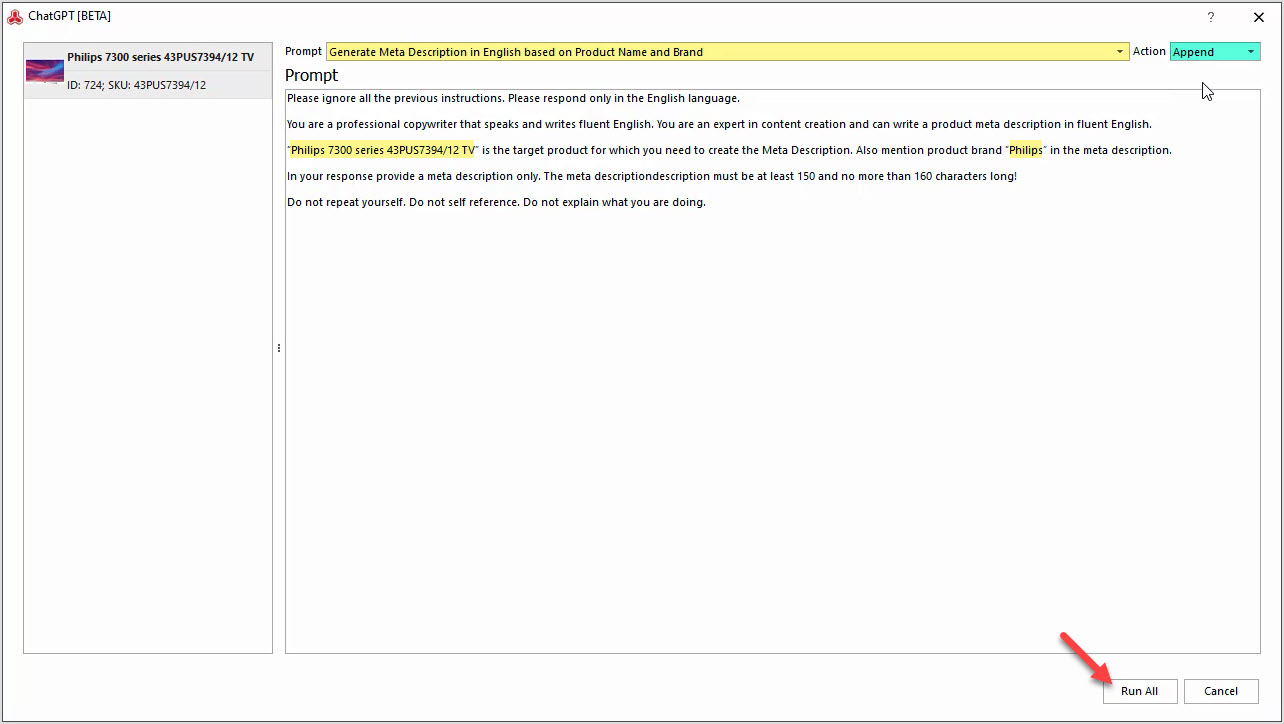
How to Generate Meta Description in English Based on Product Name and Brand
Generate a product meta description based on a product name and brand in bulk with ChatGPT plugin in Store Manager. Read More...
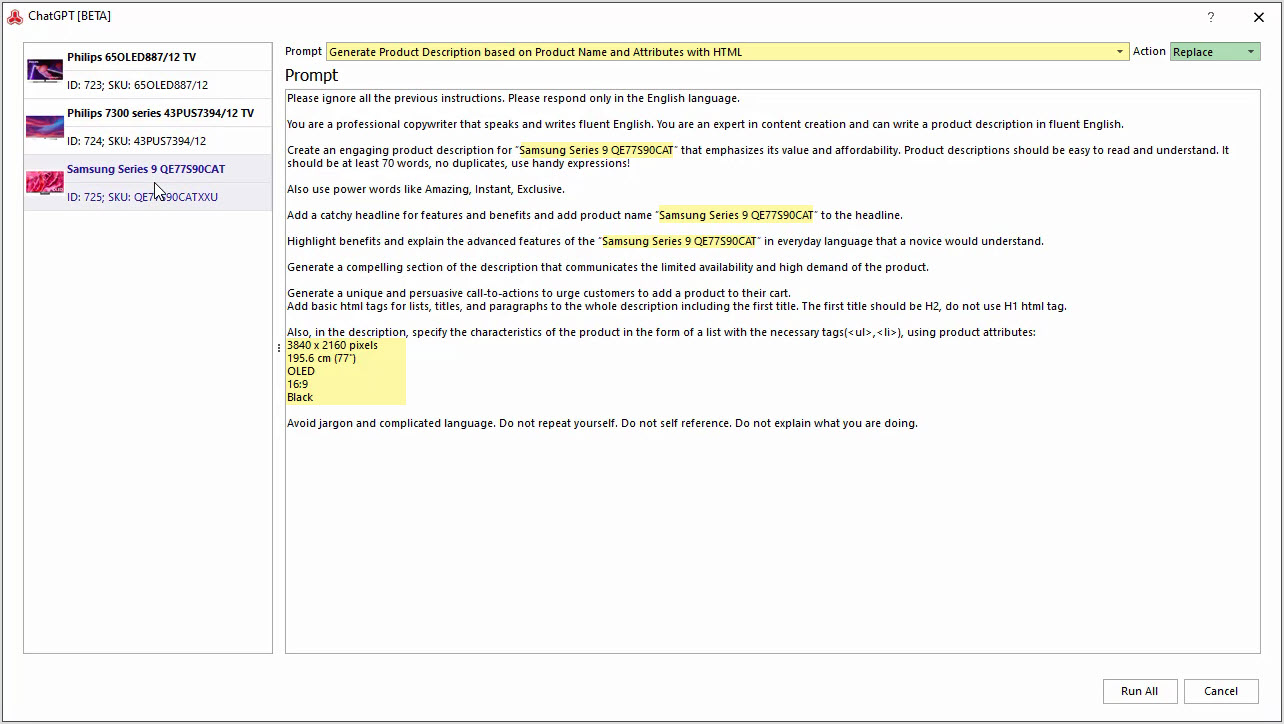
How to Generate Product Description Based on Product Name and Attributes with HTML
Generate Magento product descriptions based on the product name and attributes in bulk with Store Manager for Adobe. Read More...
How to Generate Product Short Description Based on Product Name and Product Brand with ChatGPT
Generate short descriptions based on product name and brand in bulk with Store Manager for Adobe (ex Magento) software. Read More...
COMMENTS