
How to update Magento 2 sources via import?
Magento 2 allows Multi Source Inventory update via export/ import operations. It is possible to assign new sources or update quantities for all or specific sources by SKU.
You can use this article to guide you through this process in a step-by-step manner.
How to Update Sources in Magento 2?
Via Magento 2 Admin
Via Store Manager for Magento
What Data to Export
To update Magento 2 sources, you need to export and then to import the following data:
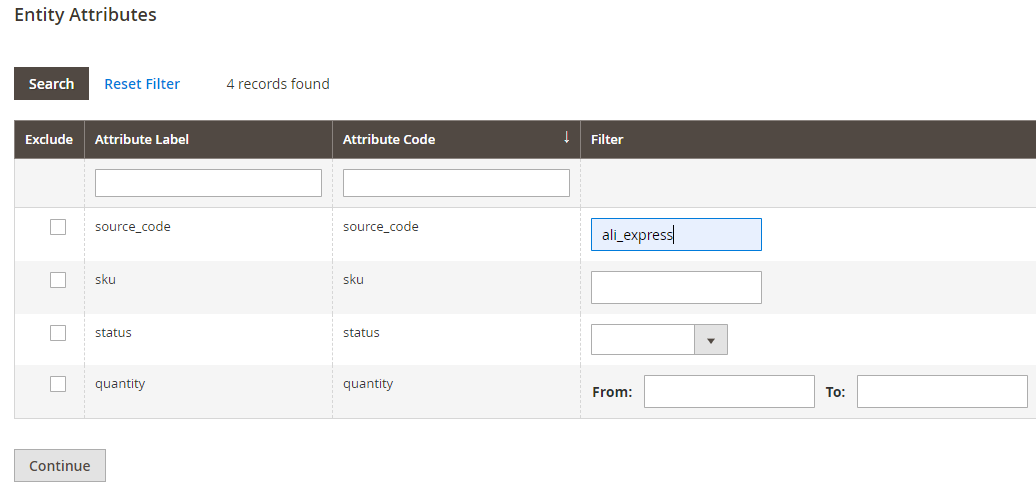
source_code- the code of Magento 2 sourcesku- product SKUstatus- 0 for Out of Stock, 1 for In Stockquantity- inventory amount available for this SKU and source
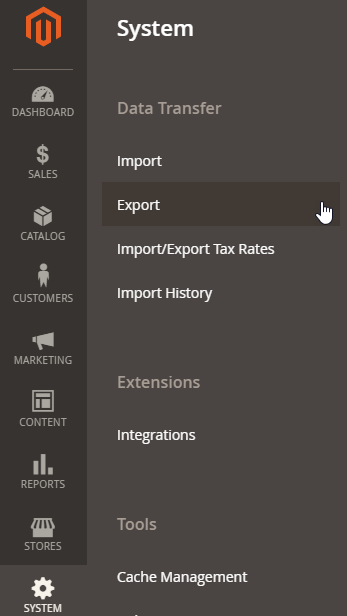
Exporting Stock Sources
To export the products for all or specific sources, do the following:
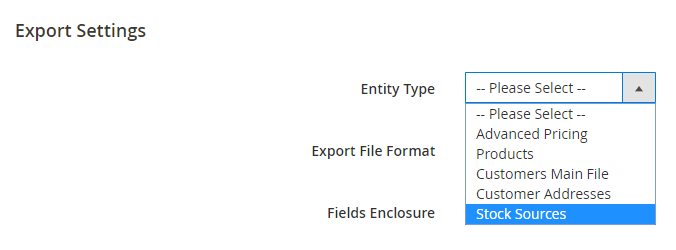
- Go to System => Export.
- Select 'Stock Sources' Entity type.
- Scroll down to 'Entity Attributes' section.
- To filter products by sources, input the source code into the corresponding field. (You can find the list with source codes, if you go to Store => Sources).
- After you press 'Continue', you will get the file downloaded.
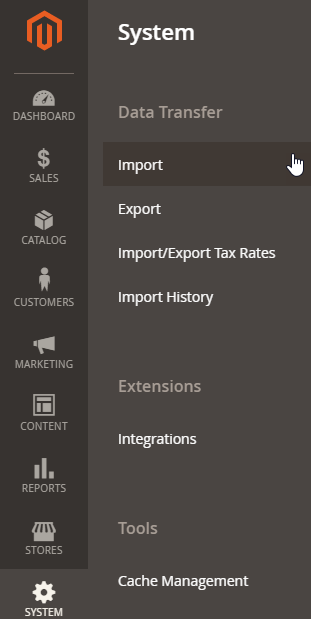
Importing Stock Sources
After you have made the modifications to the CSV, you need to import it back to Magento.
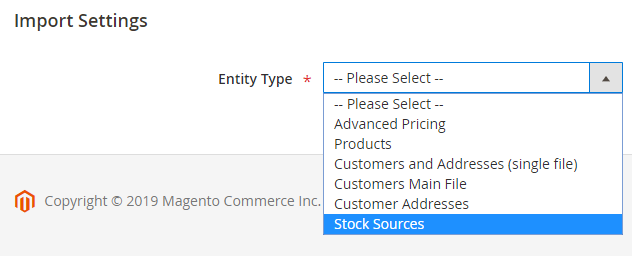
- Go to System => Import
- From the 'Entity type' drop-down, select 'Stock Sources' option.
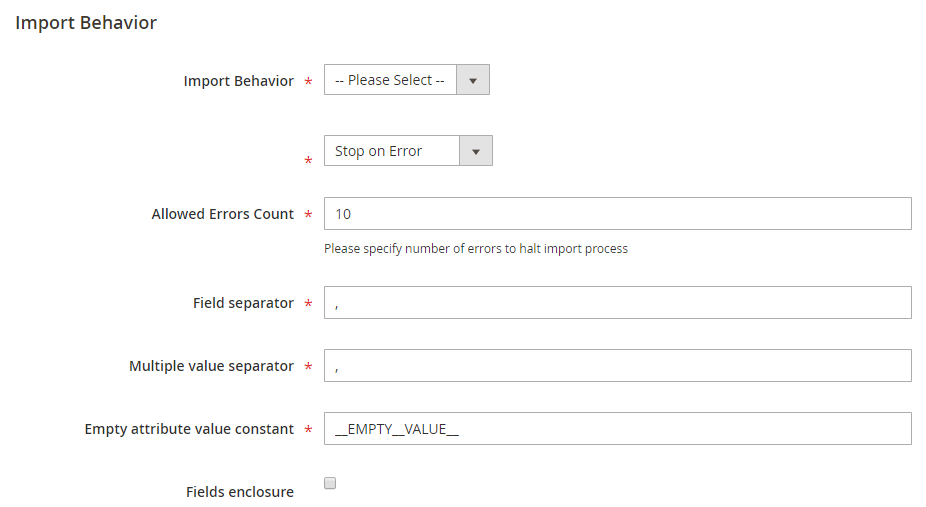
- Configure Import Behavior settings.
- Choose the file to upload.
Advanced Magento 2 Source Update with Store Manager
With Store Manager for Magento you can update Magento 2 sources by the analogical way of export/ import. Compared to Magento 2 admin, Store Manager allows to update source data simultaneously with other product details. You can select all necessary database fields that need to be exported and updated afterwords.
What source details can be updated via Store Manager?
- You can assign / unassign new sources (only those that are already created in Magento 2 admin)
- You can change product quantity per specific source
- You can modify stock status per specific source
- You can change Notify Quantity configuration
Exporting Source Details
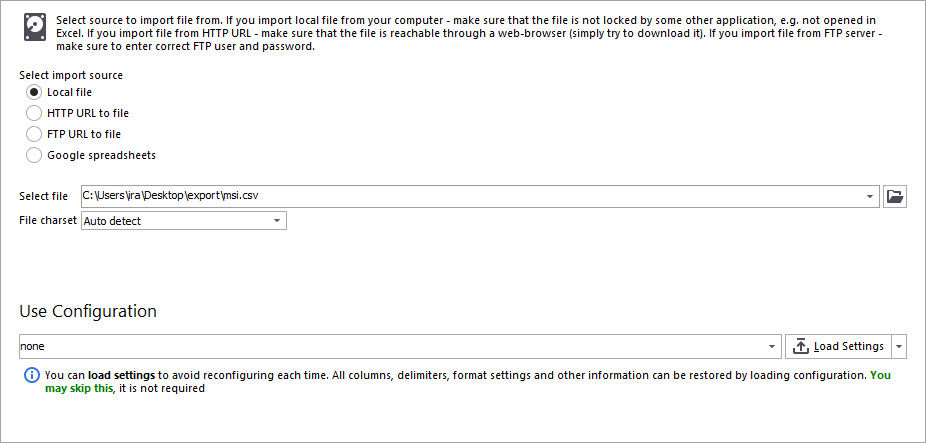
First you need to export the products whose source data you want to change.
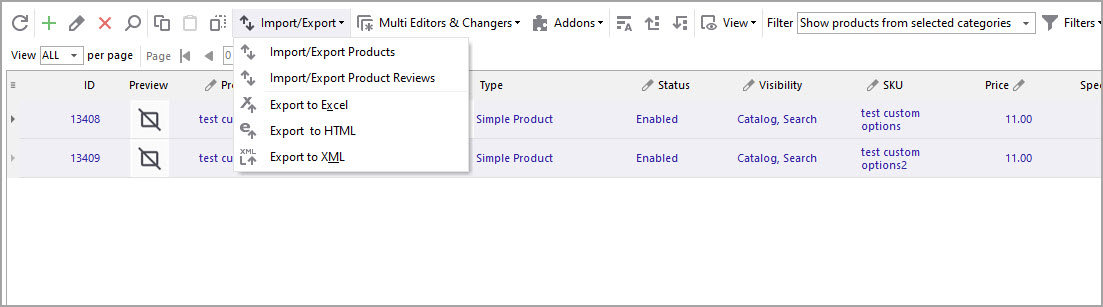
- Highlight necessary products and from Import/Export wizard dropdown select 'Import/Export products' option.
- Select 'Export' option.
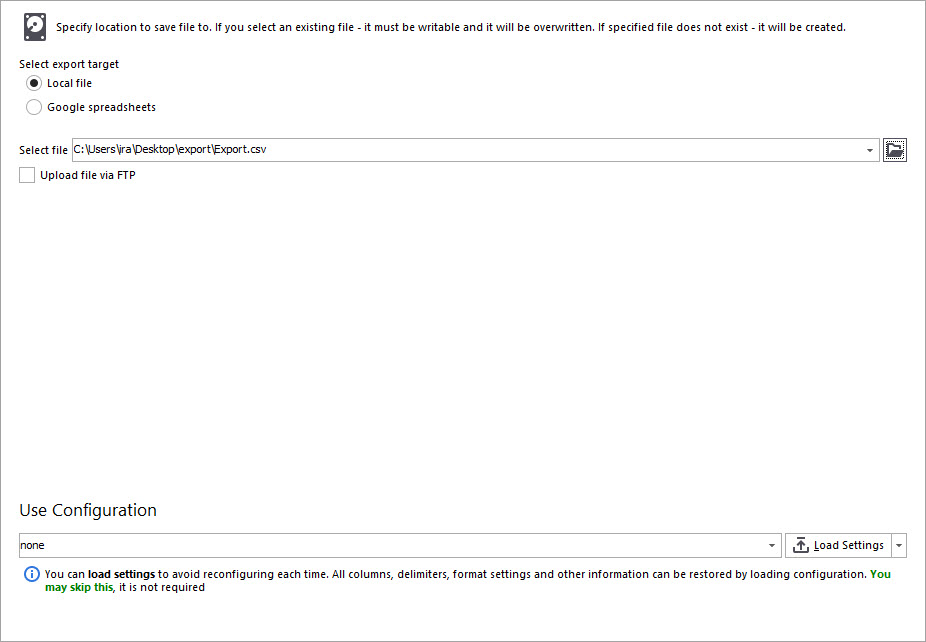
- Choose a location to save the exported file to.
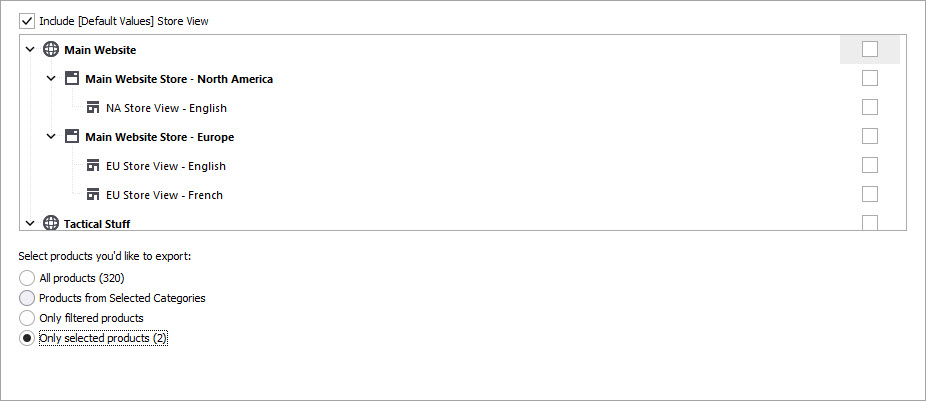
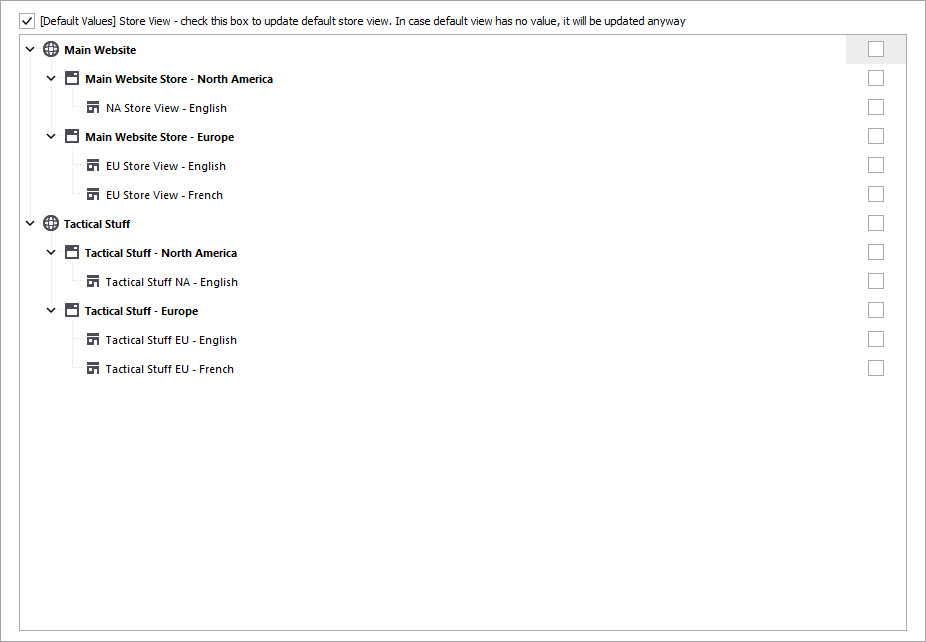
- Select what products to export. If you want to export only highlighted products, tick 'Only selected products' option. Also, check the store views that you want be updated.
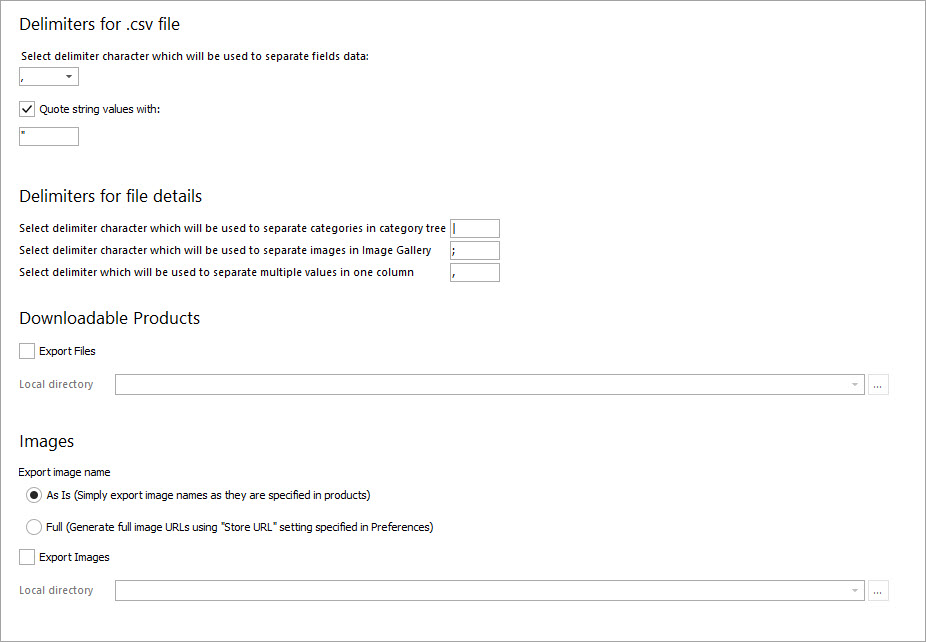
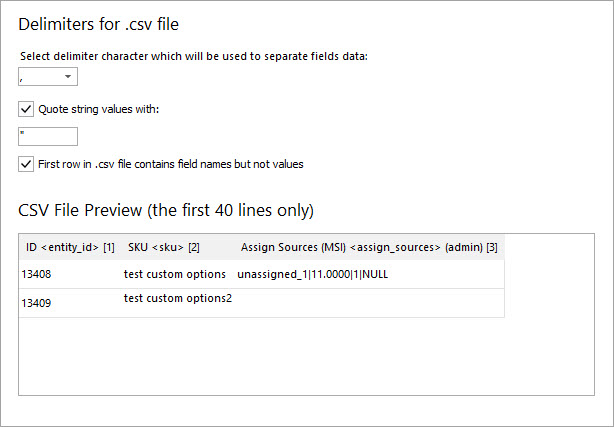
- Set up the delimiters.
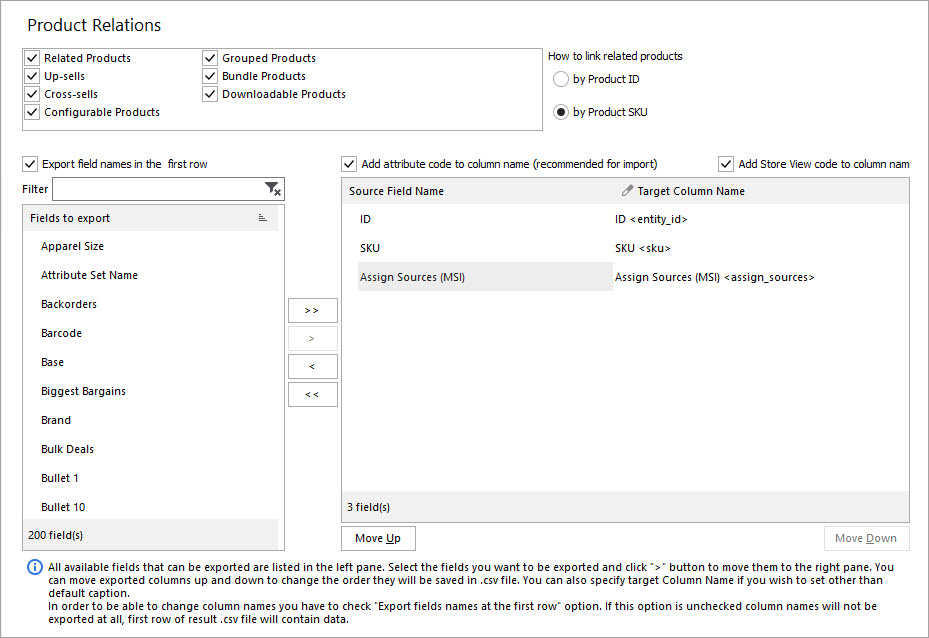
- Select data fields to export. Make sure to include 'Assign Sources (MSI)' field to get source data exported per product.
- Preview the export file. In case you find some incorrect data, you can move back and check through the steps again.
- On the same step, before pressing 'Finish' button, select the after export action. You can also save the configuration to use it when updating sources next time.

Updating Source Details
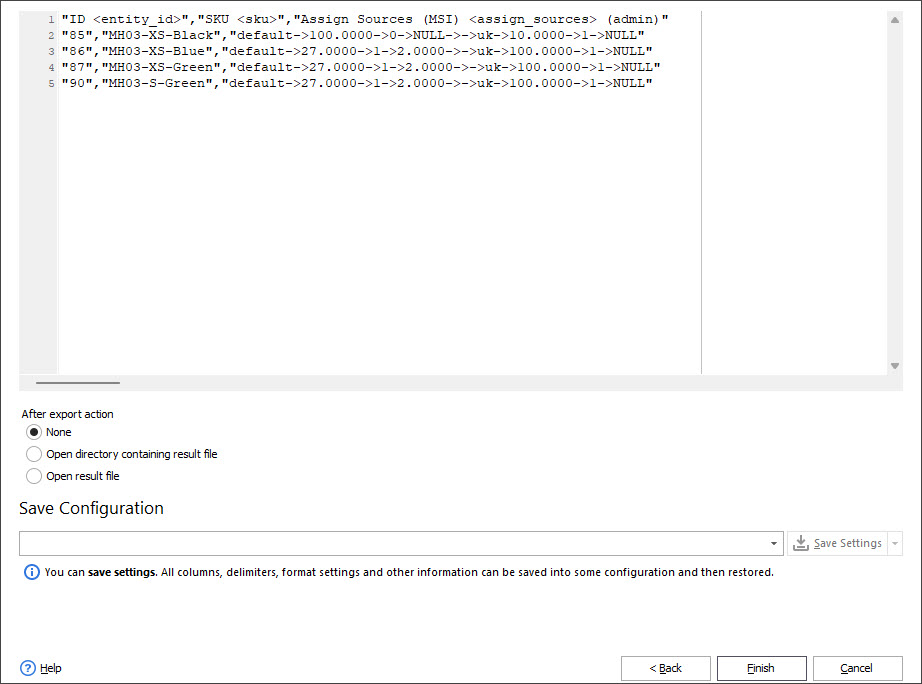
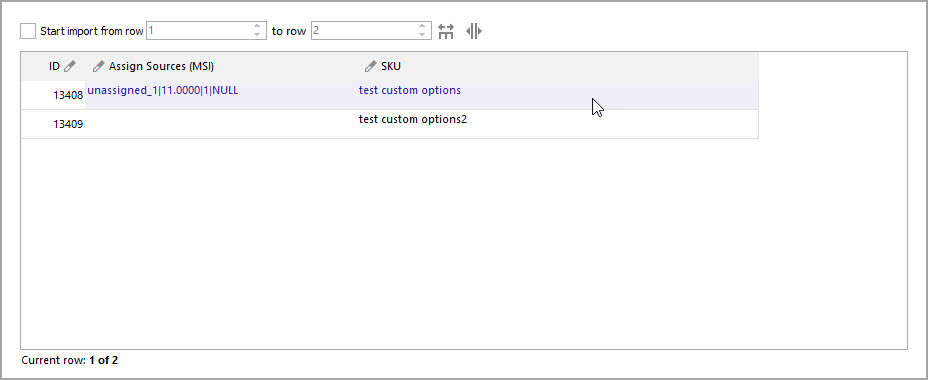
Now, when the products are exported, you can start modifying the CSV. To update source details, find 'Assign Sources (MSI)' column. For you to better understand each of the values contained in the field, we recommend you to check the CSV sample and the explanation below:
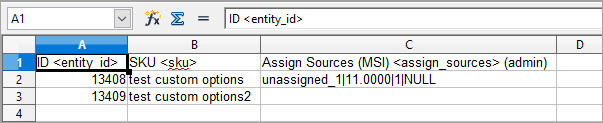
ali_express - is source code
5000.0000 - qty per this specific source
1 - stock status per this specific source ( 1 states for "in_stock" and 0 states for "out of stock")
NULL - notify_stock_qty ( NULL states for "use_config")
Each of these values can be changed for every exported product. Just make sure your modifications meet the specified format.
When you are done with the changes, you can import the file with updates back to Magento.
To accomplish that, follow these steps:
- Launch Import/Export wizard and form the dropdown select Import/export products option as you did for the export.
- Choose Import action.
- Select the exported file with the updates.
- Choose the delimiters for the CSV and preview the import file.
- Set up delimiters for CSV file details.
- Select which store views to update.
- Select how Store Manager should identify your products: by SKU, product name, EAN code, etc.
- Check how the configured import file looks like. If you find some incorrect data, go back to previous steps and check the configuration.
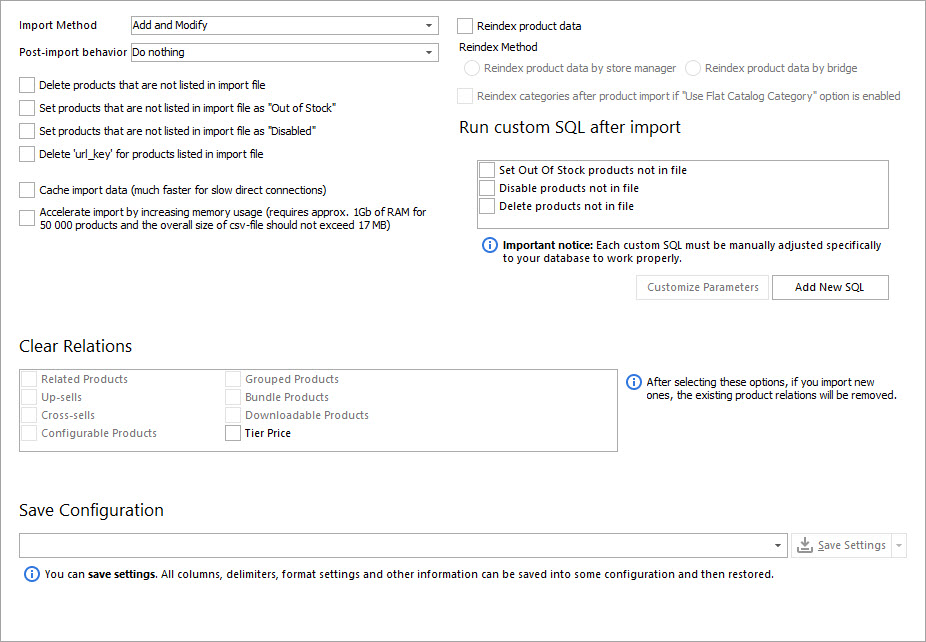
- Select import method:
- Add and modify - to add new items and modify the existing ones
- Add only - generate new products and do not update existing ones
- Modify only - to update the existing items
- Just add - add new products without searching the existing ones
- Press 'Import' button.

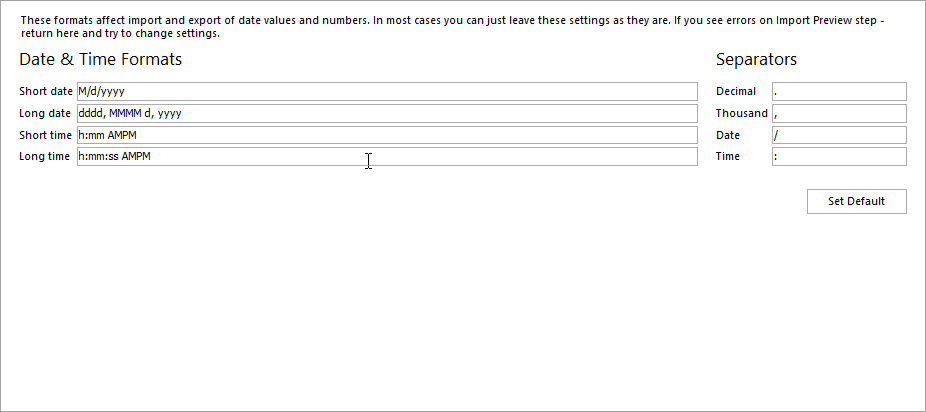
In case you are importing date values and numbers, configure the Date & Time formats. If not, you can leave them unchanged.
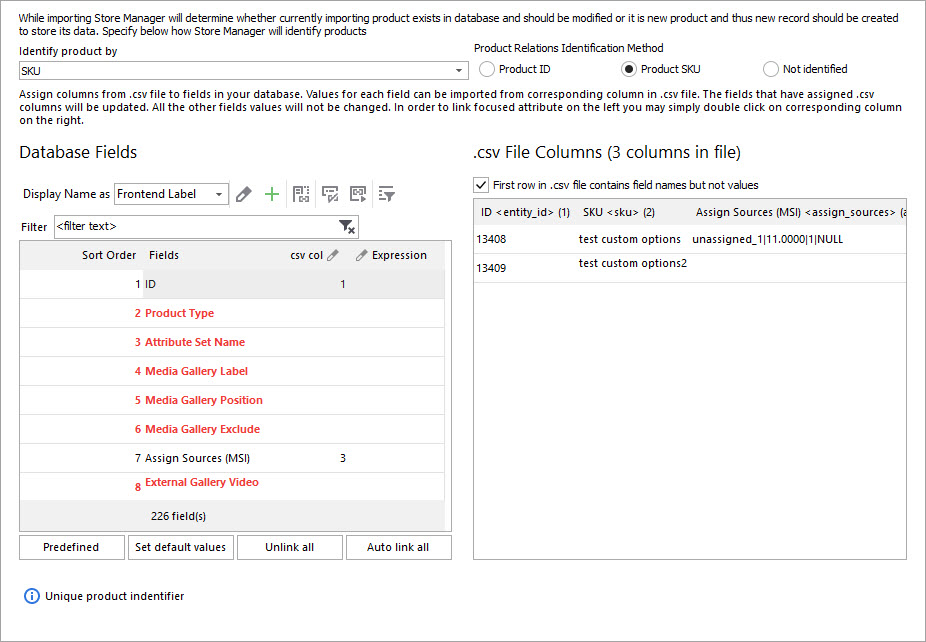
Assign csv columns to Magento database fields. To do that, click on a database field and after that click on CSV column name. To ensure the field is assigned, check csv col column - it should contain the number of assigned columns.
With multiple import options and possibilities Store Manager cares for Magento 2 update to be as correct and flexible as possible. You can update all necessary product details in one go with no need to divide the process into a few parts.
Update Magento 2 Sources with Store Manager for free - Try Now
COMMENTS